Showing posts with label alita. Show all posts

Sunday, March 20, 2011

Spinach Feta Pie


Here's one of my favorites from Guestblogger Alita. I've been eating and making this recipe for years. The variations are endless, everyone seems to love it, and it's great as an unusual brunch dish or a vegetarian main course. Leftovers reheat perfectly too. --A Crafty Lass

Years ago I was invited to a 3-day creative retreat which was held at a spa located on a serene old farm about an hour West of Minneapolis.The retreat may have been informative, I don't really recall - because the most memorable thing I took away from that retreat were recipes for two items that my cooking repertoire would suffer without!

The chef on staff thankfully introduced me to this amazing rice and egg-based pie, and also a "healthy" wheat germ brownie, that may appear here soon. I make this pie pretty regularly and never hear complaints. To keep us from getting bored of this menu staple, I've taken liberties with the recipe over the years. We all quickly decided that this one, filled with Greek flavors, is our favorite version.

The original recipe was basically white rice, spinach, feta and eggs, topped with cheddar cheese but for this post I wanted to mix it up a bit. Erin and I often bounce ideas off of one another, sharing recipes frequently, and after brainstorming together decided that some added Greek-oomph would make this dish shine.

I upgraded the white rice to brown rice for the added fiber and other nutritional benefits and mixed in lemon, herbs and olives. I did struggle with the topping, thinking that cheddar was a little off-theme, but the bubbly, gooey cheese on this is a must, so I went with it. Enjoy this served with a spinach or Greek salad on the side.

For 6 Servings:
  • 1 tablespoon butter
  • 1/2 cup chopped onion
  • 2 cloves of garlic, minced
  • 2 teaspoons flour
  • 1/2 teaspoon salt
  • 1-1/3 cups milk
  • 1/4 cup lemon juice
  • 2 cups cooked brown rice
  • 4 ounces (115 grams) crumbled feta cheese
  • 3 eggs, lightly beaten
  • 2 teaspoons chopped fresh parsley
  • 1 teaspoon chopped fresh oregano
  • 1/2 teaspoon chopped fresh thyme
  • 10 ounces (280 grams) frozen chopped spinach, thawed and drained
  • 10 kalamata olives, sliced
  • 1 cup shredded cheddar cheese
Preheat oven to 400f (200c). Melt the butter in a pan over medium heat and saute the onions and the garlic for 3-5 minutes. Stir in the flour and salt. Gradually add the milk, stirring with a whisk until well-blended. Stirring constantly, bring to a simmer and cook until slightly thickened, 1-2 minutes. Remove pan from the heat and gently stir in the cooked rice, feta, eggs, lemon juice, herbs, spinach and olives.

Pour the mixture into a 9-inch pie plate coated with cooking spray. Sprinkle the cheddar cheese over the top and bake for 30-35 minutes.

Monday, February 7, 2011

Coconut Macadamia Blondies

I've been a blogging slacker this week but thanks to my good pal, Guestblogger Alita, I got a needed reprieve so that I can do some cooking and get back on schedule. I'm sure you'll all enjoy these delicious-sounding blondies. ---A Crafty Lass

In deciding what special treat I wanted to bake for my Valentine, I thought about his all time favorite cookie. I know he's not alone - you know the ones, those delicious Samoas that the cute little Girl Scouts so innocently sell us every year. I feel so good supporting them and teaching them about goals, making money and people skills (at least that is what one little girl told me - good sales pitch for a 8 year old, I thought!). In case the one person on earth who hasn't tried these cookies happens to be reading this today, the cookie is covered in caramel and coconut and of course drizzled with 5 perfect lines of chocolate. That purple box doesn't last long at our house - once you open it, you might as well not close it again!

Since my sweetie is not a big chocolate fan like me, I thought a cookie bar or blondie would be a good base, and after taking stock of my baking cabinet, I settled on a cross between the above mentioned Samoas and the always popular white chocolate macadamia nut cookie. So, I cooked up a recipe for Coconut Macadamia Nut Blondies. And, much like that purple box, this pan of bars did not last long!
  • 1 stick of butter, melted (8 tablespoons)
  • 1/2 cup brown sugar
  • 1/2 cup white sugar
  • 1 egg
  • 2 teaspoons vanilla
  • 1/4 teaspoon salt
  • 1 cup white flour
  • 1/4 cup whole wheat flour
  • 1 cup coconut (heaping)
  • 1 cup white chocolate chips
  • 1/2 cup semi-sweet chocolate chips
  • 1/2 cup chopped macadamia nuts
Preheat over to 350f. Line an 8x8 baking dish with parchment paper. In a large mixing bowl, mix together the melted butter with the brown & white sugars. With a spoon, mix in the egg, vanilla and salt until combined. Slowly mix in the flours, coconut, white & chocolate chips and the macadamia nuts until blended.

Pour the batter into the lined pan and smooth the top. Bake for 25-30 minutes, the center should still be a little soft. Let them cool a little on a wire rack before removing them from the pan. Slice into squares and present to your favorite valentine!

Sunday, January 16, 2011

Gnocchi with Roasted Cauliflower & Hazelnuts

Here's a comforting, creamy gnocchi dish from Guestblogger Alita. Mmmmmm, cauliflower and hazelnuts! This recipe should warm up all my coldweather pals. ---A Crafty Lass

It's January in Minnesota which means we see gray skies or snowflakes every day while our beautiful landscape is laying dormant, buried under a thick blanket of snow and ice. And as crazy as it sounds, I
love Minnesota, so I've adapted to the cold. The key is to be well equipped to survive and possibly even enjoy a Minnesota winter: down jacket, hat, scarf, mittens, and tall boots are all required but maybe most important: some good comfort food!

My family's favorites include grilled cheese with a bowl of roma tomato soup, a pan of lasagna to share with friends, a steaming bowl of wild rice soup with homemade bread and of course, creamy macaroni and
cheese. These nourishing recipes all help us get through the long months of cold and ice.

This gnocchi recipe will be added to that list of favorite comforts from this day forward. The fluffy potato gnocchi paired with the sweet, nutty flavor of roasted cauliflower and bright red peppers are sauced with light cream and topped with the delicious crunch of toasted hazelnuts. It is just what you need on those cold, dark January nights.

So, here's to the days getting longer again, and hope for the annual, but too short lived "January Thaw" to arrive very soon.

For 4 servings:
  • Half of a red bell pepper, chopped in large chunks
  • Half a head of cauliflower, broken into small florets
  • 4 teaspoons olive oil, divided
  • 2 cloves garlic, chopped
  • 1/4 cup chopped onion
  • 3/4 cup cream
  • 1/2 cup vegetable broth
  • 1 package of gnocchi (approx. 1 pound (.45 kg), depending on brand)
  • 1/2 cup chopped hazelnuts
Toss the cauliflower florets & red pepper chunks with 2 teaspoons of the olive oil along with a generous pinch of salt & pepper. Roast for about 15-20 minutes at 400 degrees. Roast the hazelnuts in a separate pan for the last 5 minutes of this process. While the cauliflower is roasting, saute the garlic and onions in a skillet with the two remaining teaspoons olive oil over medium heat. Remove from the heat and add the vegetable broth. Slowly whisk in the cream and return to the heat. Simmer gently until the sauce thickens.

Meanwhile, cook the gnocchi according to the package directions (drop in boiling water & cook approx 3 minutes). Drain and gently toss the gnocchi with the roasted cauliflower, peppers and sauce. Plate and sprinkle with roasted hazelnuts. Enjoy and stay warm!

Wednesday, October 13, 2010

Pumpkin Scones with Walnuts & Chocolate Chips

I love pumpkin season back home and these scones from Guestblogger Alita are the perfect, seasonal treat - I only wish that I was there to be her official taste tester! Thanks to Alita for yet another great post. ---A Crafty Lass

As excited as I was about Erin's latest adventure and the decision to move herself & A Crafty Lass to the land down under, I was also pretty sad. Erin is the friend who has taught me a lot about myself, about life and about cooking and experimenting with recipes - she's the friend who even ate the mistakes (and there have been more than a few in the 10 years we've been sharing creations)! I hated to say goodbye - but I wish her all the best, and no matter how many miles from each other life takes us, I'll be with her here guestblogging on this amazing site.

Here in Minnesota, we also said goodbye to a beautiful summer and have been watching the leaves transform from bright greens to vibrant shades of yellow, orange and red. As we welcome autumn, we find leaves that crunch beneath our feet and pumpkins for sale in many farm fields just outside the metro area. This time of year my mind immediately turns to transforming those roadside pumpkins into delicious baked treats. I have a long list of pumpkin favorites: pumpkin spice cake, sweet breads, pumpkin bars, pumpkin oatmeal cookies and of course pumpkin pie. But I quickly realized I'd never done a breakfast pumpkin creation. Scones immediately became my first fall baking project. The combination of pumpkin, whole wheat flour, walnuts & chocolate chips make these a hearty start to the day, and a perfect accompaniment to that coffee or hot tea you'll need here on these crisp autumn mornings.

For 8 Scones:
  • 1 cup white flour
  • 1/2 cup whole wheat flour
  • 1/3 cup sugar
  • 1 teaspoon baking powder
  • 1/4 teaspoon baking soda
  • 1/4 teaspoon salt
  • 1/2 teaspoon cinnamon
  • 1/4 teaspoon nutmeg
  • 2 tablespoons softened butter
  • 1/2 cup pumpkin puree
  • 1/3 cup plain yogurt
  • 1/2 cup chocolate chips
  • 1/2 cup chopped walnuts
Frosting:
  • 1 cup powdered sugar
  • 1 tablespoon milk
Preheat the oven to 400 degrees. Sift together the flour, sugar, baking powder, baking soda, cinnamon, nutmeg and salt. Add in pumpkin, yogurt and butter, mixing as you add each ingredient. Mix in the walnuts & chocolate chips. Form the dough into a ball and place on a lightly floured surface. Pat the dough down into a circle about a 1/2-inch thick. Cut the dough into 8 pieces and put them on a baking sheet (I use a silpat). Bake for 15-20 minutes or until the edges are crisp and the top is lightly browned. Let them cool and then frost.

To frost: whisk the powdered sugar with the milk and drizzle over the scones. Enjoy!

Friday, June 4, 2010

Frozen Berry Pie in a Vanilla Walnut Crust

I'm so happy to welcome Guestblogger Alita back! It's been far too long. She and I have talked about how our mom's used to make a variation of this pie when we were growing up and so am thrilled that she took the same concept and used fresh, seasonal ingredients. --A Crafty Lass

This fabulously frozen berry pie has seen many variations in our house. It or something similar are always welcome when the temperature & humidity of a Minnesota summer keep me from wanting to make any type of dessert that requires the oven to be on for an hour or more.

This recipe was developed as I was staring at many quarts of frozen strawberries from an amazing U-Pick place near my family’s cabin near Ottertail Lake and at some point I decided I could & should use them for more than my soy strawberry banana smoothies! I remembered having a similar pie at graduation parties & summer BBQs over the years that was a little too pre-packaged/processed for my taste: pre-made graham cracker crust with an artificially flavored yogurt/cool whip filling. So I became interested in finding something similarly refreshing, yet less processed.

This more homemade version uses a nice combination of fresh strawberries & blueberries that nicely enhances the creamy, sugary base. The crust can be made of other types of crackers or cookies you prefer – we’ve used graham crackers & chocolate wafers in other variations. I think the vanilla wafer & nut combo is my favorite though. Pecans are a great substitute for the walnuts. Any combination of berries would be delicious, I like adding raspberries when they are in season. And as an added bonus, it is perfect to make a day or 2 ahead of when you need it… just remember to take it out of the freezer a little while to thaw slightly before serving.

This dessert is the perfect ending to a backyard BBQ and could be easily be made into individual portions in ramekins or a cupcake pan for a more sophisticated garden party. To dress the pie or individual dessert up a little, finish with some fresh whipped topping, pretty berries & a sprig of mint. Enjoy!

Crust:
  • 1½ cups vanilla wafers crumbs
  • ½ cup chopped walnuts
  • 5 tablespoons melted butter
  • 2 teaspoons vanilla
Filling:
  • 1½ cups sliced strawberries
  • ½ cup blueberries
  • ¾ cup sugar
  • 1 egg white
  • 1 cup sour cream
Combine the vanilla wafer crumbs, walnuts, butter and vanilla in a bowl. Press the mixture into the bottom & sides of a regular 10” pie pan (a little slightly taller 9” pie pan works too). Bake for 8-10 minutes at 350 degrees. Remove & let cool.

For the filling, combine strawberries, blueberries, sugar & egg white in a mixing bowl. Beat at high speed until it forms soft peaks (could take up to 10 minutes). Gently incorporate the sour cream by hand. Pour the filling into the crust & place the pie in the freezer. Be sure to take it out a little while before serving so it’s not impossible to cut, it will freeze fairly solid. A dollop of whipped cream is always a good way to finish.

Note: If you use frozen berries, you can decrease the sugar to about ½ cup.

Sunday, November 29, 2009

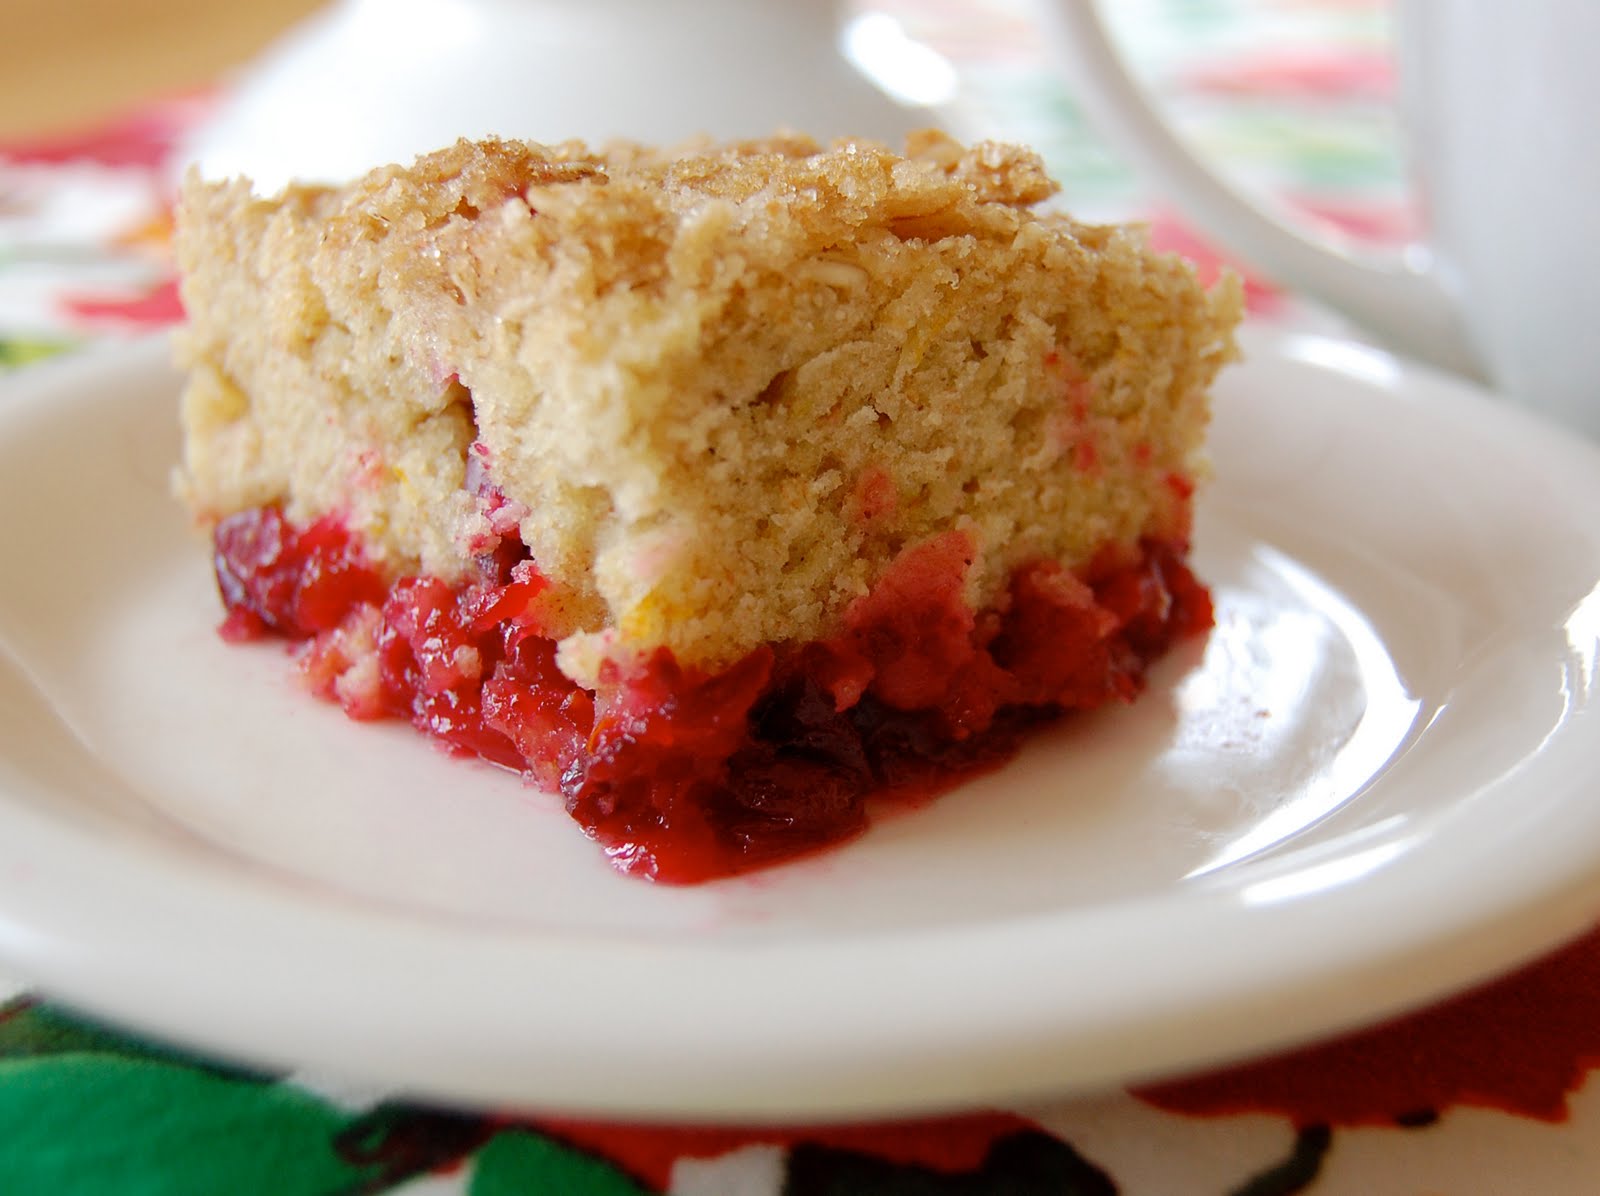
Cranberry Orange Coffee Cake

Much like Guestblogger Alita, I can't get enough cranberries this time of year. I love cake for breakfast so there is no question that I will be trying this recipe out soon. Thanks to Alita for the perfect holiday brunch recipe! --A Crafty Lass

I love that it is cranberry season - I can’t stop myself from buying fresh cranberries every time I go to the store this time of year. But, it always surprises me how quickly they disappear from the produce section after the holidays, so I usually freeze a few bags and use them well into the new year.

I love the cranberry's bright red tartness and the way they kind of melt when baked. Their nutrient content and antioxidant qualities aren’t bad either! Cranberries are a “superfood” and any time I can incorporate healthy ingredients into my desserts, I consider it a small victory.

Over the years, I have developed several cranberry baked goods into my repertoire. Family favorites include a simple but delicious Cranberry Orange Scone & a brilliantly red Cranberry Upside Down Cake. This particular recipe is well on its way to being a new favorite. It's suitable as a morning cake and pairs well with a hot cup of coffee or tea. It will likely grace our table for Christmas morning brunch.

The Bottom:
  • 3 cups fresh cranberries
  • ¾ - 1 cup sugar
  • 1 teaspoon cinnamon
  • 1 teaspoon orange zest

The Cake:

  • ½ cup butter, softened
  • 3 eggs
  • ½ cup sugar
  • 1/3 cup milk
  • 1 teaspoon orange extract
  • 1 teaspoon orange zest
  • 1¼ cup all purpose flour
  • ¼ cup whole wheat flour
  • 1 teaspoon baking powder
  • ½ teaspoon salt

The Topping:

  • 2 tablespoons brown sugar
  • 2 tablespoons white sugar
  • ½ tsp ginger
  • ½ tsp cinnamon
  • 1/3 cup oats
  • 2 tablespoons cold butter

Preheat the oven to 350 degrees.

Prepare the cranberries: Toss the cranberries with ¾ cup sugar (a little more if you want a sweeter version), cinnamon & orange zest and pour into a greased 9-in square pan.

Prepare the cake: cream the butter and sugar. Add the eggs, milk, extract & orange zest and mix well. In a small bowl, combine the flours, baking powder & salt and add to the butter mixture. Drop the batter by spoonfuls over the cranberries & carefully spread to cover the entire surface.

Prepare the topping: combine the sugars with the ginger, cinnamon and oats and cut in the butter until it become crumbly. Sprinkle the oat mixture over the cake and bake for 40-50 minutes.

Thursday, June 11, 2009

Rhubarb Slush

I outright demanded that Guestblogger Alita get this recipe from her mom because I have been hearing about the infamous slushes for years now. I will be making this immediately and look forward to (maybe) sharing these with my pals. Thanks to Alita (and her mom) for this very seasonal post. --A Crafty Lass

I enjoy the subtle tartness of rhubarb in all forms: straight from the garden sprinkled with a little sugar, baked into delicious upside down cakes, muffins & sweet breads, warm cobblers, and of course fruity jams & jellies - the list could go on & on!

This particular treat allows us to enjoy rhubarb throughout the summer months in a frosty, alcoholic form! You will enjoy sipping these long after the plants are done producing the gorgeous red stalks we see during the fleeting weeks of late spring and early summer.

This drink was a favorite of my mom & her Iron Range girlfriends long before I could enjoy the alcoholic deliciousness of it. The recipe makes almost a gallon container full of slush – more than enough to share on many hot summer nights!

For one gallon of slush:

  • 8 cups chopped rhubarb
  • 2 quarts water
  • 3 cups sugar
  • 1/2 cup lemon juice

Boil in a large saucepan for 15 to 20 minutes until soft. Strain out the pulp and reserve the liquid in a large bowl.

To the warm rhubarb liquid, add:

  • 1 small package strawberry Jello
  • 2 cups vodka

Pour the mixture into an ice cream pail or other large freezable plastic container and stir well.
Place in the fridge overnight and stir it whenever you think of it. The next morning, place in the freezer. Allow to “freeze” for a day or so.

To serve, fill a glass 1/2 full of slush add 7-UP, club soda or ginger ale.

Wednesday, May 13, 2009

Homemade Dog Treats

I am pleased that my longtime friend and co-worker, Guestblogger Alita, did a post for me. Alita and I have been cooking and crafting together, with success and some disaster for almost a decade. These treats are a favorite of my two dogs. --A Crafty Lass

These started out as K-9 Cookies to give out with our annual boxes of holiday treats, but it quickly became a ritual to bring them when we visit friends with pups - and to send a big bag home with lucky dogs that we dog-sit, which was the occasion this particular time.

The variation shown here is a Three Herb version - but we've tried them all and the dogs have yet to complain! And - knowing they don't have any strange additives, preservatives, or other mystery ingredients makes me feel good about giving them to the dogs we love.

For 12 Large Treats:

  • ½ cup cornmeal
  • 1¾ cups whole wheat flour
  • 1 tablespoons garlic powder
  • 6 tablespoons oil
  • 2/3 cup broth (chicken, beef or vegetable)

Variations: Try adding one of these to make your pups favorite flavor treat!

  • Bacon Bits
  • BBQ Sauce
  • Peanut Butter
  • Three Herb - Our favorite combo: Parsley/Thyme/Oregano

Preheat the oven to 350 degrees. Mix all ingredients together well.

Roll the dough out to a 1/4 inch thickness (you might need a light dusting of flour on the counter, they can get a little sticky). Use a dog bone or other fun shaped cookie cutter to press about 12 large treats.

Place the treats on a baking sheet and bake for 35 minutes. Let cool for 30 minutes on the baking sheet. Stand back & watch your favorite pup gobble up these yummy treats!

Adapted from a Humane Society Recipe